Code Monkey Tries to Animate

As I mentioned that next step is adding animations. It’s a bit daunting to me to be honest. To start I skipped the video and downloaded the files Tree House provided. They were 22 Crystal Ball images where they ball basically lit up all mystical like and then faded back to the original. Once I saw that I thought about what I wanted Yoda to do. Speak the answer, obviously. I fired up Episode I and found a scene of Yoda talking. It was harder than I expected to find one of him close up and straight on, but I found one from the Council Chambers that should work well. That, as it turns out, was the easy part. Next I had to compile a number of screen shots from the film. Not too hard using VLC. Then cropping them all since I didn’t want the entire frame. THIS was difficult. I found a plugin for GIMP that allows batch editing of images so you can do the same thing to multiple images. Perfect! Except it only allows some basic fuctions, which while cool and time saving, still left me with a lot of work to do to get my 52 images ready to animate. I used the plugin to crop them all to the same size. Then I went through each one individually and applied an elliptical cutout around Yoda using the same X, Y coordinates so that he wouldn’t bounce around while animating. If anyone knows of an easier way to do things like this please let me know!

One of the Fifty-Two Yoda images I edited to make him Talk

Once I got those all the way I thought I wanted them, I finally fired up the next video to learn what to do with them. The files they included for download for the Crystal Ball animation included an XML file that I recreated for my yoda animation. I did that and followed the instructions for actually coding in the animation, and was greeted with the following:

Error message

My App has Stopped

That is pretty much where I am right now. I’m currently going over what little debugging I know to try and find the cause.

Code Monkey Makes Pretty Little Changes

Hello everyone! I continue to work through the Android Developing Adventure at Tree House. I’m on Stage 3 of building a simple app. It is titled “Pretty Little Things.” As you might have guessed we are prettying things up a bit. They added a crystal ball image to their background, but I found a nice image of Yoda looking wise to use.  A fair bit of what we covered here I have already learned, but doing it again will help to cement it in my mind and learning from a different source allows me to pick up a few new tips.

I’m running into more issues from using Android Studio as opposed to Eclipse. We went through adding a Theme (or rather changing from the default one) to the application in AndroidManifest.xml. They were able to simply pull up a nice interface that let them choose the Theme from a list of them by clicking on the Application tab at the bottom of the androidmanifest page, but I didn’t have that tab (or any of the ones shown in Eclipse) so I had to figure out where and how to add it manually to the xml code. Not a huge deal, but it was a bit of a setback for me. I wish they had covered both ways in the video, but I understand they want to keep it simple and if I had followed the first step in their videos I would be using the same IDE they are.

Theme Code in AndroidManifest.xml

If you look closely at the above image you can see we also set our main activity to only run in portrait mode. When we got our image added and changed the theme we ended up with no button or text on our screen. They were actually still there, but behind the image. We re-ordered the components in the component tree and could once more see everything. There was still a problem through. Our button was now right on top of the image. We moved it down to the bottom. Next we wanted to get the answer text to appear as if it was floating in the crystal ball (They did anyway, I followed along and made the words float over Yoda’s face). We added a Linear Layout (horizontal) and placed our Text view in it. To center our text view we added two blank views to either side of it in the Linear Layout and manipulated the weight of the three components. I could not find the blank views that they used in Android Studio so I used something called Spaces that were described as simple views. They did the trick the same as the views, but it appears they are from a later API and I might have to tweak that at some point. Once we got the Text View inside the Linear Layout lined up where they wanted it for their crystal ball, I moved mine down below Yoda’s Face. Before I’m finished with this I would like to add a something that says “Ask Yoda” above his image. Here is what the app currently looks like when you open it.

Opening Screen at this point

Background changed to Green since Yoda answered in the Affirmative

I was planning on continuing, but I just noticed the next part is on animation. I don’t feel up to tackling that right no so I’ll leave it here for now.

Team Tree House?

I’ve started using teamtreehouse.com since reading about it for the first time yesterday. I’m not sure how far I’ll be able to go with it because it is actually a paid program (service?) and I don’t have spare funds at the moment. I was however able to score a free first month through a promotion I found, so I’ll try to make the most of it. It is way more interactive than simply watching videos. It includes quizzes, and coding challenges that let you know if you got it right as well as the usual follow along videos I have come to know from mybringback and other sources.

Mike the frog, Team Tree House’s mascot

I started at the beginning of the Learn Android Adventure and am just working my way through it. I have learned a few new things. They recommend always using scale-independent pixels (sp) which I think I agree with. They will scale based on the size of the screen as well as the user’s font setting for the device. If I understand correctly using density pixel would stay the same size no matter what the user had the device’s font to set to. This would potentially cause your app to be unusable by someone with poor eyesight who had the font set to large so they could read it. That would be bad.

I’m also learning about arrays! Arrays can be used to store a number of different values from one data type. You tell the computer that it is an array by using square brackets after the data type (String[]) and then open curly braces to start your list of values. That was a terrible description so I’ll just include a picture of my code for the app tree house has me making. Actually, I’m altering the app a little. They are making a Crystal Ball app, and I’m not into that, at all. So I am making an Ask Yoda app.

My First Array in Java/Android

I was excited to cover if statements because mybringback hadn’t touched on them yet and I remembered them being such a big part of the course I took on Python.  It seems like they will be a fairly big part of Android dev as well, and I imagine of any type of programming. Before we made our array as seen above we simply had 3 possible answers: Yes, No and Maybe. We had a random number generator (Which is also new for me in Android) that could give us 0, 1 or 2 when we ran it. We used this with an if statement to assign 0 to Yes, 1 to No and 2 to Maybe. This worked great and was a simple way to introduce if statements. When we added are array we pulled that if statement out. I have added a new one to my code though that changes the background color dependent on whether the answer was positive, negative or neutral.

If Statement to change the Background text

I’ll stop there for now. I’m really liking Team Tree House. I really think I’d like to continue using it after this first free month runs out. I’m going to see if I can work it into my budget somehow. That said, if you are interested in learning anything in their library please consider using my referral link. It will get you 50% off your first month and I’ll get $5 off my next month.

Learning Adventure 

Some of the things you can learn

Here’s my referral link: http://referrals.trhou.se/tonywhitney


Code Monkey Works with some Java

Hello Everyone!

Been busy the last couple days with some boring stuff like lawn care (I was trying to grow a jungle, but my wife didn’t like that plan). I only managed to get one lesson in. It was Lesson 14 and was all about using the getText() and setText() methods. There really isn’t a whole lot to talk about here. We set up a few more ids on our radio groups from lesson 13 and then we started setting up the methods to make them work. We set up textOut to output text, or at least we started to. I don’t think we finished anything yet. We set up textIn to get the text we will output. We also set up our radio groups so we can get them to do stuff later on.

Our TutorialOne.java code after lesson 14

My First App

I started working on the layout of my sound effects app. I’ve decided I will do as much of it as I can on my Nexus 7 using AIDE.  AIDE is a Java IDE that can build and compile apps right on your android device. I highly suggest checking it out if you make apps at all. I see myself mostly using it just to tweak or make small changes later on, but I thought I’d see if I can build a basic app with it. As I said I’ve only just started building my layout. If I can get my wireless keyboard running it’ll be much faster sailing. Stupid batteries! So far I have got one layout file started with 4 buttons across the top that I used a Horizontal Linear Layout and weight to appear as tabs at the top of the screen. I plan to add 3 columns of 4 or 5 buttons each. I tried to add a Text View under the tab buttons, but I couldn’t get it to appear properly. I am pretty sure I need to give it it’s own Linear Layout to get it to work. I’ll try to do that tonight.

Sorry this post is so short. Hopefully

Code Monkey Does Not Wish to Be Sued

Hello Monkey followers!

Before I get into the lesson’s I’ve done since the last post I wanted to just talk about this blog a little. First up is my update schedule. I plan to post something every Tuesday and Thursday. Hopefully with each post I’ll cover 2 or three tutorials for as long as I work on them, and when I’m done then I’ll post about what I’m learning as I develop apps. You might also see the occasional weekend post if I get wrapped up in something development related and want to share, but mostly my weekend computer time will be spent gaming.  I’d also like to talk about what this blog will focus on and what it’s become. I never intended it to be a step by step tutorial, and it won’t become that. But at this point I feel it is a good supplement for anyone working through mybringback’s tutorials. It is my hope that even those not working through them will find them informative, or at least a little amusing. Let me know what you’d like to see!

I started working nights this week so my days are a little messed up and thinking is more difficult, but I think I’m still learning. Lesson nine from mybringback was all about audio. It went pretty smoothly. Adding a media player was remarkably simple.

MediaPlayer logoMusic;

That’s it. Well, that’s it for adding the media player. To start it wasn’t too much harder. I’ll put the code snippet that got it running below.

This code starts the Music running

I did have a few problems with this that I’ll go over quickly in case it helps anyone else. 1) Where it says MainActivity up there, that is the class you are working in. Travis’ had main there in the tutorial so I just wrote what he did and it didn’t work because I don’t have a main class. I used Android Studio’s tool tip on the error to sort things out. 2) Next my music file (The Mermaid) was throwing an issue. The tool tip said it was an invalid name. So I removed the space in it and changed the first capital (theMermaid). AS still didn’t like that so I changed it again to themermaid and it worked no problem.

Before we ran the program we added an onPause method to our activity, and told our MediaPlayer to release the music when the activity paused. This caused the music to stop when the 5 second sleep timer ran out and the app moved on to our menu screen.

mybringback’s Lesson Ten makes our buttons work! Yay! OK, let’s get into this. Our buttons were made earlier, so all had to do with them was make sure that they had id’s. “@+id/tutorial1” That was easy. We also had to create a new xml layout file. Travis left his completely blank and to start with I did as well, but when I ran into trouble I added to it by putting in my ugly background an a TextView. I’ll get to the trouble I had later, as well as my eventual solution to it. We set up the button in our menu class.

The Code from our Button

We learn the basics of the OnClickListener from this. We set up the button first by naming it and telling it what id it is. Then we tell it to listen for clicks. Finally when it clicked (onClick) we start a new activity with the intent that follows. This was a new way of doing intents and I feel it cleans things up as opposed to having a line of code above it. I’ll try to use this way in the future when possible. If we tried to run our app at this point, it would not work. We haven’t declared the activity in the AndroidManifest.xml file. To do this we copied the last activity we made and pasted it between the <application> tags there, then we edited the android:name to and intent-filter android:name to match the new activity we set up. We left the category as DEFAULT so that the application would know not to use it as the launcher activity. That was pretty much it. Except my app crashed every time I tried to run it.

Uh-Oh

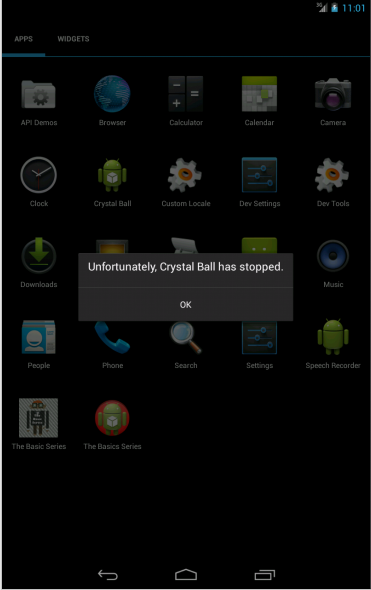
I’m not proud of how long it took me to find the problem. Travis had name various things in this lesson “TUTORIALONE”, “TutorialOne”, “tutorialone”, and “tutorial1”. This confused me to no end. I’ll need to get better at watching what labels are put on what. I spent over 2 hours looking for the issue. I looked at comments from the tutorial page and others that had a similar issue solved it by added a background to the layout file, so I did that. No dice! I finally sorted it out by re watching the video while following along in my code to find what should match up to what. I had made a mistake in the AndroidManifest file with naming the intent filter properly. After that it ran properly.

Lesson 11 got me excited. In the introduction on the mybringback web site he said that with the knowledge from this lesson we would be able to make a soundboard app and publish it, maybe start making money. That sounded great to me! First, let’s look at the lesson.

In this lesson we added sound to our buttons. He suggested grabbing sounds from soundjay.com so that’s what I did. I went with button 1… This lesson was mostly a review with really only one new thing going on that we didn’t use in our splash screen sound example. What we did was set up our second button to work the exact same as our first (sort of boring going to the same activity again) and then added a sound to them. We still used the media player instead of the media pool.

Adding Sound to a Button

As you can see on line 22 we set up the MediaPlayer. We didn’t initially make it final, but then line 32 threw an error. I’m not sure exactly why, but Travis said to add final to the MediaPlayer that made it work. That is pretty much all there was to it. Not too difficult at all and a nice review.

So after reading the introduction to the lesson I was excited. I thought I could make a Star Wars soundboard app and sell it in the Play Store. Get my fee (I think it’s $25) out of the way and maybe start gaining money to offset it before any of my other apps our ready to be made. Seemed like a fun idea! Then I thought about it longer. Isn’t the audio I would want to work with under Copyright? Doesn’t that make sound boards using them (or any other copyrighted audio) illegal? I answered yes to those two questions. So it begs a third question: Why do I see so many sound board apps on the market? Surely they didn’t all receive permission from the copyright holders to use them! Is there something I’m missing here? Can I go ahead and publish a sound board app without being sued into oblivion by Disney/LucasFilm?

Who Said Monkeys Can Spell?

Hey guys!

Lesson 6 from the mybringback Basic Android Tutorial Series was the one I’ve been waiting for. We are starting to learn Java and how it relates to Android development. I have no experience with Java programming so it’s all new to me. All the basic layout stuff is really interesting, but I remember it all from last year. I don’t remember any of the actual coding. I think I’ll just put up some code and attempt to explain what it means.

Code from main activity

Okay, so line one simply sets up the package with the name I gave it when I created it. Maybe someday I’ll set up a custom URL so I can use that. Lines three, four and five bring in libraries (?) from Android so they can be used in our app. I remember from before that you need to import different things based on parts of the OS or device you want to use such as Camera, internet, mic, ect. Line seven creates a new class which is Public, meaning it can be referenced by other classes, and it extends Activity (imported on line 4) which gives the MainActivity class all the characteristics that the Activity class has. At this point we could call MainActivity the sub-class and Activity the Super-class.

Line nine is where it gets confusing for me. Mybringback says “The “@Override” means we are overriding the method from the super class (Activity Class).” I’ll just leave it at that and continue on. In line 10 we call the onCreate method from the Activity super-class. The tutorial didn’t really specify but I think this method is used to make an activity (makes sense, doesn’t it?). This would pretty much make a page as far as I can tell. We also want to make some changes to the onCreate method and that is why we bundle it with TonyIsAwesome so that it isn’t exactly the same as onCreate because that would be boring! Line 11 is where we actually create the method. Note how we referenced the super-class. In line twelve we point to what layout file we want to display.

Lines 16-20 didn’t appear in mybringback’s code. But I think I know what it is anyway so I’ll hazard a guess. Line 17 calls onCreateOptionsMenu which I assume is why there is a menu button in the top right corner of my app. I guess this is either a built in feature of Android Studio or it is something that the SDK started including around Honeycomb or Ice Cream Sandwich. It’s a boolean, so that means it can either be true or false. Line 20 indicates it is true. I’m not sure exactly what happens in line 19, or at least I don’t know how or why it happens. I know it makes a menu button and calls up a settings option in my app. Clicking on settings doesn’t do anything. Yet. I’ll add to it when I learn how to.

This tutorial also had us add a new folder under src/main/res called raw. He had us put a sound in the raw folder. I searched my PC for wave files and found one called JKIIstart.wav. I didn’t listen to it. I assume it’s a sound file from Jedi Knight II. It’s also short and I thought that would probably be good. This .wav file seemed to have caused some issues. AS wouldn’t associate it with a file type. I chose to just remove it until I found out what we were doing with it. I also tweaked the background I had made earlier to be less transparent and set it up in the splash layout.

I’d love to hear from in the comments. Am I missing anything? Can you fill in the parts I’m unsure one?

The Next Lesson talked about Android Activity Life Cycles. We didn’t do a whole lot in here other than some set up to get a working splash screen. I’m going to put up an Android Life Cycle chart for reference, but other than that I won’t say too much about this lesson, as when it finished we didn’t have anything new working. In fact we might have broke a few things.

Activity Lifecycle chart

Lesson Eight! Android Splash Screen with a Thread. This lesson caused me all kinds of problems, but not for any good reason. We learned how to set up a Java thread with a timer and edit the AndroidManifest file a bit. I learned that a thread requires a Try, Catch, and Finally section. In the Android Manifest we told it that we had another activity and specified which should launch first. We told it to start with our Splash Screen by labeling it with a LAUNCHER category. I believe we will set all other activities to DEFAULT so they will only be started when another activity calls on them. This what we did with our new Menu Activity.

After 5 seconds on the Splash Screen the app now automatically forwards onto the menu.

The timer thread I talked about earlier was set to 5000 milliseconds so that it will stay there for 5 seconds, then run an intent to call the menu activity and finish the splash screen one. When all was said and done I tried to run my app in the emulator. It got errors. I spent 2 hours tweaking and pouring over my code trying to find them. It turns out if you spell “Activity” like “Activiy” it doesn’t know what to do. I was both mad and relieved when I found the error. It just goes to show how little mistakes can really throw you off in programming.

Travis (the mybringback tutorial guy) mentioned that Splash Screens can be a good branding tool within your apps. I’d like to say that I’m not sure I agree with him. In our example it just added 5 seconds of time that the user can’t interact with our app. To me that would just frustrate them if there is something they want to do. Maybe I’m missing something. To the real developers out there… What do you think? Do you use them?

Code Monkey Gets Gooey

See what I did there? No? Well, you might get it later.

Lesson 4 on mybringback was all about setting up a layout via a XML file. Good video and I learned some things. Including the fact that linear and relative layouts are different. I learned this the hard way as I tried to follow along in Android Studio while mybringback used eclipse. In eclipse the default layout file created a linear layout whereas AS created a relative one. Of course I didn’t notice it for a while and nothing was working properly. Once I changed over to a linear layout my layout suddenly looked like his. I’m having some trouble with the layout working (or not working) on Extra Large screens like the Nexus 10. It appears it has a seperate xml file, but I couldn’t get it to work properly. I think it also led into another problem I’ll get to in a minute.

After my mybringback showed me how to center a textview, I decided to figure out how to do the same with my button. I though it would be to add a gravity tag, but it turns out it needs to be layout_gravity for a button instead of just gravity like for the text. Next I made a really quick and ugly background image to add to my layout. I had all kinds of rendering issues with it. Mybringback showed to put the image in the res/drawable folder, but I seemed to have 4 different res/drawable folders(drawable-hdpi, drawable-mdpi, drawable-xhdpi, drawable-xxhpdi) so I stuck my background into the drawable-hdpi folder and then tried to get it to work using android:background=”@drawalbe-hdpi/background1″ It didn’t work. Eventually I tried it exactly as mybringback had it, which was android:background=”@drawable/background1″. This taught me that you don’t need to point to the specific screen density. I imagine this means that I should build the background to all screen sizes in the future and simply name them the same put in the appropriate folder. That would probably make the image look a lot better than it does on some of the screen sizes in the layout preview. A lot of them looked very stretched and distorted. I’ll keep that in mind for the future.

It was at about this point that I ran into a major issue. I went to run my app in my Nexus 7 Emulator and got errors. I’m still not sure what they meant or why they happened, but I ended up with a “Schema” problem. Android Studio said that the URI was not registered. A little looking around on stackoverflow told me this was a somewhat common issue (bug?) in the Intellij IDE on which AS is based. The only thing I could find to do was create a new project and copy over my files from the first one. This fixed my problem but was annoying. I hope it doesn’t happen again. I also hope it wasn’t caused by something I did. One error message makes me think it had something to do with the xlarge layout file I had. When I got that sorted I moved onto the next lesson.

My App after lesson 4

Lesson 5 from mybringback was more of the same, only without the XML file this time. By the way, did you get the title of this blog yet? “Code Monkey Gets Gooey” Gooey… GUI… Graphical User Interface. Yes, it’s a lame pun, but blogs are tough to title, OK? Graphically editing the GUI was pretty straight forward. The biggest thing I learned was that in AS you must right click on or in the res/layout folder in order to create a new xml layout file. For some reason I kept clicking other places and couldn’t figure out why I wasn’t getting the right option. At the end of the video he gave the homework of creating a new logo for the app so I finally installed GIMP and made a quick and ugly logo.

The Basic Series Logo

My Quick App Logo

I’m going to take the rest of the night off and spend time with my baby girl. If she has a nap I might work on a nicer background image.

The Code Monkey Slowly Remembers

Hey guys, Wannabe Code Monkey here!

I had family visiting over the Long weekend (Victoria day here in Canada) so I didn’t get too much done on the coding front. I did get Android Studio installed and working without too much trouble. A bit of problems after I loaded it when I tried to open it nothing at all happened. Turns out I hadn’t installed Java JDK on my new Windows 8 build yet. Then it still wouldn’t work until I had set up a home variable for it. I figured this out by finding a post on stack overflow.com.

I also watched a few YouTube tutorials (mybringback and thenewboston) in my downtime before the family all woke up. These were mostly redundant when using AS (Android Studio) as things are already built in, but I chose to watch them anyway as a refresher. I got as far as setting up a new project. Things started coming back to me. While looking at activity_main.xml in res/layout I saw the TextView and went to change what it said. AS was kind enough to tell me that what I highlighted (and was about to delete) was just pointing to a string elsewhere. I remembered I could find the strings in res/values/strings.xml. I also remembered thinking Strings were really cool so you could change things in multiple places at once just by altering the string file. If I recall correctly this can also really help with translation to other languages. After finding the strings file I changed the defualt hello string to something different and then added a second line of text simply by copying the TextView in activity_main.xml. This caused an issue since the original TextView had an android:id that I copied over. AS didn’t like having two of those the same as far as I could tell. I simply deleted the line from the second TextView and that worked. Next I changed the text from the hello string to just some text, with no string attached. Again that worked, although AS protested and told me I should really use a string. That’s nice of it. Also nice is that it opened a dialog box to quickly turn my text into a string. Fun! Oh dear, I find THAT fun. I think I need to play some video games to realign my head! Once that was taken care of I had a look at the design tab for activity_main.xml and noticed a new problem. The two strings of text were showing up over top of each other on the first line of the tab. Since I couldn’t figure out how to fix this when staring blankly at the text tab, I headed back to the Design tab and simply dragged and dropped the second text string down to the next line. When I went back to the Text tab it had added

android:layout_alignLeft=”@+id/textView”

to the second TextView’s field. @+id\textView is the id of the first TextView. Interesting.

Android Studio multiple layout view showing my test app

The next reasonable course of action I could think of was to get this running in an emulator. I created an AVD. I opted for the pre built definition of a Nexus 7. It wouldn’t run. I thought about searching around online to find out why, but decided to poke around first. When I went to edit I noticed a message at the bottom stating “On Windows, emulating RAM greater than 768M may fail depending… Try progressively smaller values of RAM is the emulator fails to launch…” Part of the message was cut off, but I got the main point and reduced the RAM to 700 and it started no problem. Now I’m mostly just messing around before diving into the next videos.

In other slightly related news: I had held off picking up a Nexus 7 since all the rumors pointed to a new version being released at I\O. Since it didn’t come I picked one up. This will replace my Acer Iconia A500 that isn’t working at the moment. I still hope to get it running again, but I wanted something smaller anyway. There are a few features I will miss from the A500, but so far I love the Nexus 7!

My new Nexus 7

I think I’ll go play around in AS a bit more before calling it a night. As always comments and advice are welcome!

Return of the Code Monkey

Or should that title read “Revenge of the Code Monkey”?

So, you may or may not have noticed I have not blogged in a very long time. The last time I graced this blog with my presence was back in November, 2012 which would be, oh… about 6 months ago. Yep, half a year!!

If you were paying attention, you know that I was taking an online course through coursera.org. I was attempting to learn how to code in Python. I bet you have a few questions. And if not, that’s ok. I’ll answer them anyway!

1. Why did the Monkey stop blogging about the course?

This is pretty simple. The course was really challenging for me. It took most of my free time just to watch the lectures and complete the assignments. With working full time and doing the course, plus spending a little bit of time with my wife, I didn’t have the energy to write much.

2. What did the Monkey think of the course?

As I mentioned, it was hard for me. I’m not really that great at math and I quickly found out that the course was going to require a lot of it. I ended up doing some extra homework to bring my math skills up to par. You see this particular Monkey seldom payed attention in Math Class. Plus High School is a few years ago now… “I’ll never need this in real life!” “This is dumb.” “Why are there letters in this math?” are all phrases you might have heard uttered by me in high school. Sorry Mr. Bodnarick. Funny aside, earlier this week I asked my 14 year old niece what she learned in school that day. “Nothing.” she replied just like every time I ask her that. I pressed on and she told me she had learned something about triangles inside of circles and that she would never ever use that in life. I felt very old as I explained to her that I used to think that about everything taught in Math, but now I wish I had payed more attention. What she was learning this week might have helped me build pong in Python! Woah! off topic. Once I made it past each math hurdle thrown at me, I enjoyed the course. It was challenging but I learned a lot about coding and about how to think about programming. While taking it and ever since I find myself thinking in If/Else/Then statements a lot. Hopefully this type of thinking will help me as I continue.

3. What have you been doing since the course ended?

Not coding. I actually did not complete the course. I didn’t plan it out too well and for the last 2 weeks of the course I was in Disney World. I had the course loaded up on a laptop with the intentions of doing it there and I did work on it a bit in the first few days, but in the end the sunshine and the “Magic of Disney” won out and I chose to just enjoy myself and see and do as much as I could while there.

2012-12-04 10.22.36

And when I got home? I had lost momentum and didn’t pick back up where I started. Instead I ended up playing video games. (Star Wars: The Old Republic in case you were wondering) I stopped coding all together. I couldn’t convince myself to finish the Python course alone using an online IDE (codeskulptor.org) that I would never use again with a programming language I didn’t really plan to use in the future. I didn’t get back into Android coding either. I did nothing,  and then life got a bit crazy. My wife and I moved 669 KMs (416 miles) from where we had been living. We had a beautiful baby girl. I left my job as a Computer Technician and started life in a factory making corn chips. In short a lot of big changes in a short time.

4. Why is the Monkey returning now?

AndroidStudio

Google I\O 2013 unveiled the Android Studio IDE. Seeing this announcement reminded me that I still have apps I would like to make and a desire to know how to make apps in general. Shortly after I was downloading the new IDE and looking for tutorials again. I’ve decided to stick to strictly Android developing. It’s what I want to do and I feel the Python course was a great intro to programming in general, but I’m want to focus on things I can apply directly to my app idea’s. I have Evernote notebooks filling up with thoughts and plans, but I don’t know how to implement them yet!

My first step back into the coding world will be to go over some video tutorials from bringmyback. I watched the first one which was on Eclipse/ADT/SDK install. All made very simple with Android Studio! I bet soon I’ll be making another “Hello, World!” app.

If you have any tips or suggestions I would love to hear them in the comments.

Code Monkey says goodnight.